Once you have started to successfully overclock, that will ensure that you are overclocking in a completely safe way.

Operating at only the level required is the best way forward.
While overclocking is not as dangerous as it used to be in earlier times, due to the better quality of chips in the market, you must not take too many liberties with your GPU, otherwise you may end up causing serious damage to not just your graphics card but also your motherboard.
There are simple steps that you need to follow in order to fine-tune your overclocking.
But do remember that overclocking will void your user’s warranty of GPU. So, do overclock but at your own risk.
One last thing that is useful for all users of MSI Afterburner is to put your system through a ‘Stress Test”.
Steps For Fine-tuning Your Overclocked GPU:
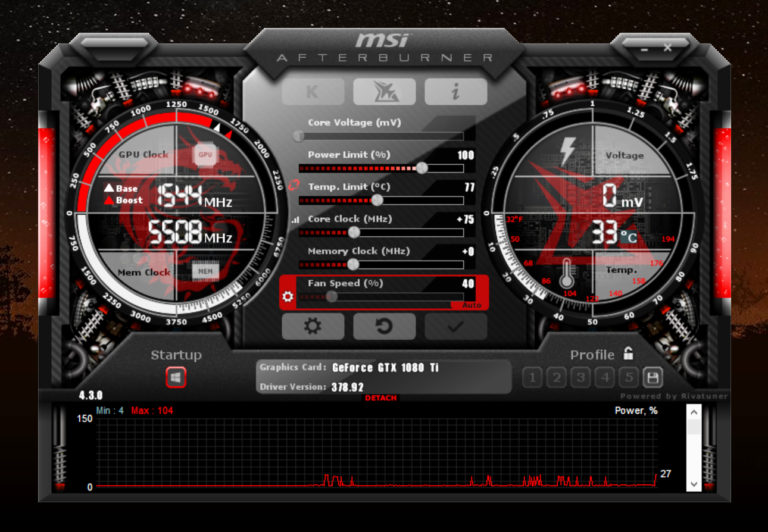
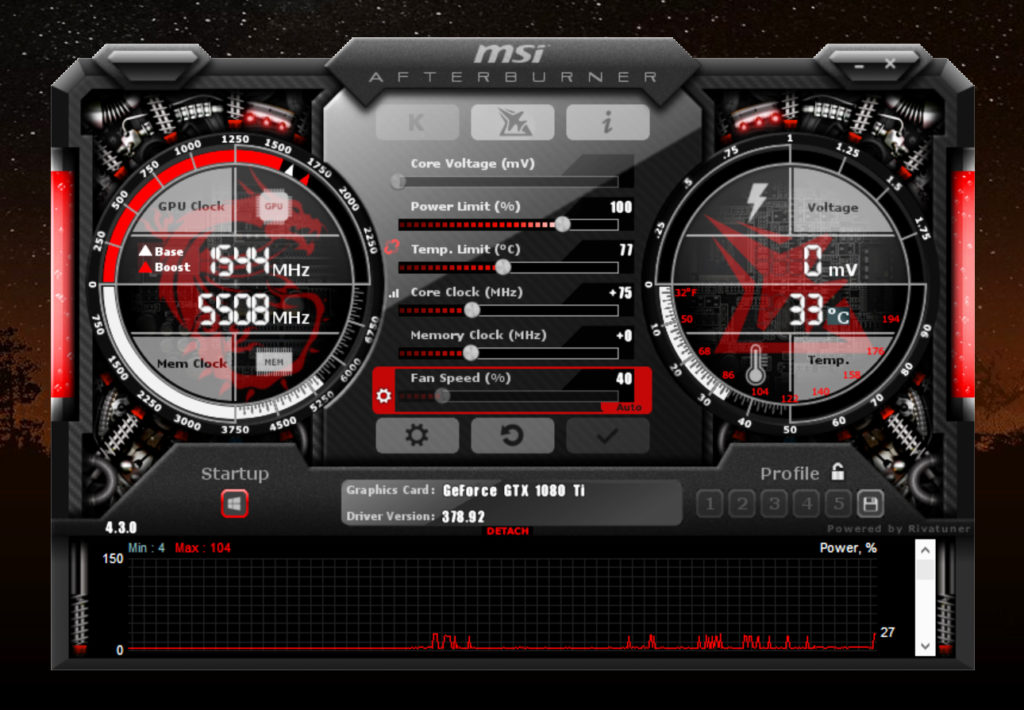
- Once you have been able to deduce the maximum limit of core voltage and the corresponding maximum limit of core clock, you need to find out the levels of both these parameters at which your specific graphic-intensive software’s function smoothly.
- For this start any game or other software that you think needs overclocking.
- Start raising the core clock to the point where you can operate the software smoothly.
- If you reach a stage where the screen goes dark or glitches appear on the screen or any other problem arises, then revert to the previous level of core clock at which you were operating.
- Now to further overclock, increase the core voltage by small measures and then increase the core clock.
- The level at which you are able to operate that specific software without any difficulty, can be saved as one of the five profiles with the Afterburner. For that, just press the save key and the profile will be saved.
- Now, when you open the specific software, just activate that particular profile by clicking on its number and you are good to go.

Having your GPU always overclocked at maximum level possible would not cause immediate problems in your system.
The reason for not always having the maximum overclock on is that when you have the maximum overclock, the fan has to operate at its highest speed as the core voltage is also at its highest level generating more heat that has to be dissipated.
This would generate more noise that can be disturbing. Whereas, by saving profiles at which the particular software’s operate smoothly, you need not bear the unnecessary noise from the fan.
Also, having your GPU always overclocked at maximum level possible would not cause immediate problems in your system but higher the level at which you overclock the system, the shorter the life of your GPU would be. Therefore, operating at only the level required is the best way forward.
Through the settings of Afterburner, you can also decide whether the application would be launched at start-up or when you choose to do so.
In the latest version of MSI Afterburner, there is a key which allows you to have the then-prevailing settings automatically applied at the Windows startup.
Other ways you can do this is by clicking on the settings icon that will open the ‘MSI Afterburner Properties’ dialog box. There you can choose the option ‘Start with Windows’ and have the same result.
One last thing that is useful for all users of MSI Afterburner is to put your system through a ‘Stress Test’. This will test the efficacy of your graphics card when it is put under the setting you have chosen as your maximum overclock.
Steps For Stress Testing:
- Run the benchmarking application you have. This time, don’t click the ‘Benchmark’ key but let the program run.
- Let the program run for a few hours, at least a couple. If no issues arise and the program keeps running without any difficulty, then you can be rest assured that the maximum overclock you have attained is safe.
- Alternatively, if you are yet to figure out the optimum level of your overclock, then run the program for a few minutes, and if there are no issues, increase your overclock and keep doing so until you face any issue. Then go back to your previous level and repeat step 2 to check whether that level is safe.
With the above steps taken, you can proceed to overclock your system safely.



0 Comments